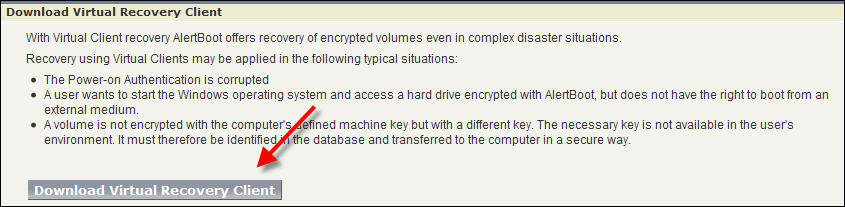
AlertBoot offers recovery of encrypted volumes even in complex disaster situations, with its feature called the Virtual Client recovery.
When the Power-on Authentication is corrupted.
When a user wants to start the Windows operating system and access a hard drive encrypted with AlertBoot, but does not have the right to boot from an external medium.
When a volume is not encrypted with the computer’s defined machine key but with a different key. The necessary key is not available in the user’s environment. It must therefore be identified in the database and transferred to the computer in a secure way.
HINT: Virtual Client recovery should only be used to resolve complex disaster situations. If several of the above mentioned issues apply, a Virtual Client recovery is appropriate.
The user can start an AlertBoot recovery CD or any other CD with an AlertBoot modified WinPE on their computer from BIOS without any POA logon and initiate a Challenge/Response session with a key recovery tool.
The user’s key recovery tool then tells the user which volumes are encrypted and which keys are used for each of these volumes. The user presents this information to the AlertBoot helpdesk officer.
The user enters the response code. Within the response code the required keys are transported. By entering the response code and restarting the computer the user can then re-access the encrypted volumes again.
If the response code was correct, the transferred key will be imported to the local key store. After that, all volumes that are encrypted using this key can be accessed.
The Virtual Client Recovery procedure for an AlertBoot Administrator can be divided in two phases:
Phase I - Downloading the Virtual Recovery Client
A problem is reported from an endpoint user. You need to provide an external bootable medium to the user, in order to recover the encrypted volumes of the problematic machine. For this, you are required to download the ISO image and burn it on to a CD, to be given to the user.
There are two ways of downloading the Virtual Recovery Client.
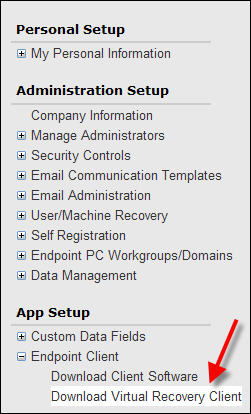
From the AlertBoot Setup | App Setup | Endpoint Client | Download Virtual Recovery Client.
This will take you to the Download Virtual Recovery Client page. Click Download Virtual Recovery Client button, to download the EXE file for the bootable device to your local machine.
From the User/Machine Recovery Tab. The steps are detailed below.
Click on the User/Machine Recovery tab from the AlertBoot homepage.

Select Virtual Client (Used for corrupted MBR recovery) option from the drop-down box.

WARNING: This option should be selected only in such disaster situations, when the user is not able to boot his machine, or facing a machine corruption. In situations where the user needs a new password to logon back to his system, you should select the Safeguard Enterprise Client option.
The User/Machine Recovery screen is displayed.
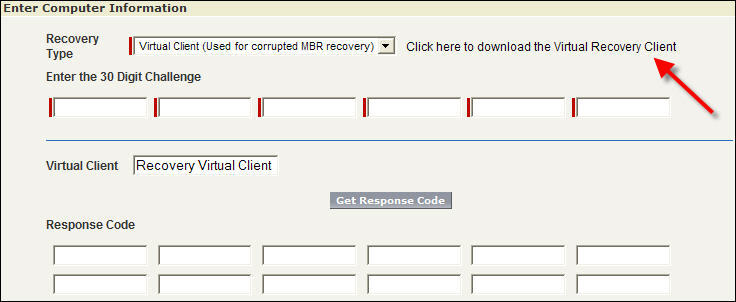
Click Click here to download the Virtual Recovery Client.
This will take you to the Download Virtual Recovery Client page.
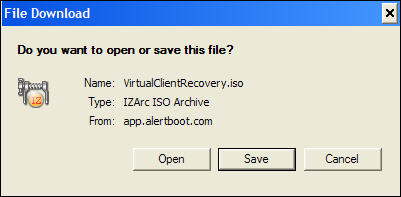
Click Download Virtual Recovery Client button, to download the ISO file for the bootable device to your local machine.
Click Save to save the ISO image file in a preferred location on your local machine.
Burn an ISO image CD, to be given to the endpoint user. If you are providing a bootable USB drive, see Creating a Bootable USB Drive.
NOTE: You can provide the ISO image in a USB device, or in a bootable hard-disk, but make sure that the machine supports an external bootable device.
Send the bootable device to the endpoint user.
You need generate a Response Code, once you obtain a Challenge Code from the Endpoint user.
Select Virtual Client (Used for corrupted MBR recovery) again, from the User/Machine recovery screen.
Obtain the machine name of the endpoint user and select the machine name from the drop-down box. This is critical in helping you to select the correct key that was originally used to encrypt the end point machine.

You can select options provided to sort the machine list either by the machine owner name, or by the machine name.
Obtain the 30 digit challenge code from the endpoint user and enter the 30 digit challenge code.

NOTE: The Challenge Code is valid only for 15 minutes after it is generated. Enter the code and generate a response quickly, before it expires.
Click Get Response Code to generate a response code for the endpoint user.
The Response code is displayed.

Provide the response code to the endpoint user.
Windows Vista (any edition) with USB 2.0 ports
Virtual Client Recovery ISO image burnt on a CD
USB Drive greater than or equal to 256 MB
ASSUMPTION: This operation assumes the end point machine can boot from a USB enabled device. Check the BIOS settings of the endpoint user’s machine, to make sure.
Insert the USB flash drive in the USB port, on a Windows Vista machine.
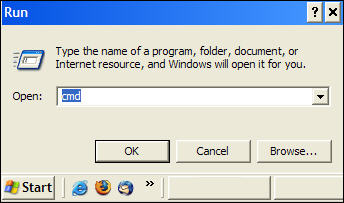
Enter cmd on the Run screen, to go to the command prompt. Windows Start | Run | cmd.
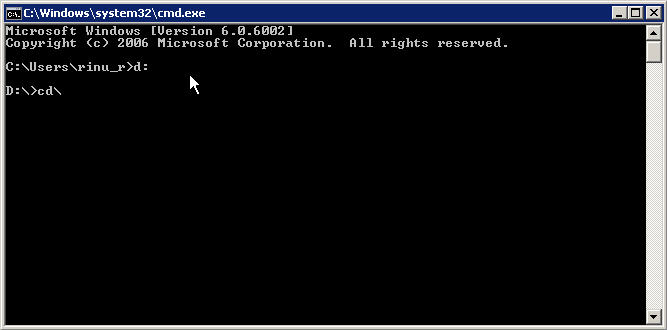
Change the drive to where the diskpart utility is stored. For example C:\> d:
Enter cd\ command to go to the root directory.
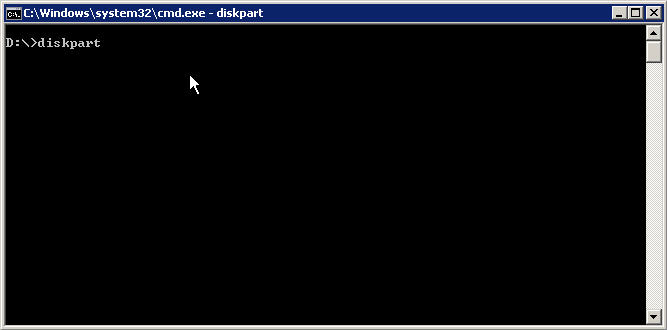
Enter the following commands on a new command prompt window to format the drive.
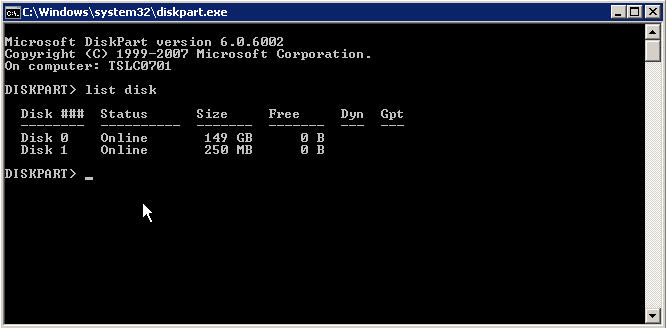
:\>diskpart
A new application window opens.

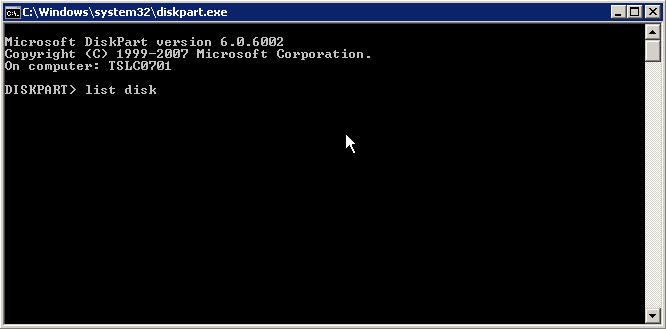
To confirm that you are formatting the correct drive, enter list disk after entering the diskpart command. Ensure that your USB flash drive is selected.
:\>list disk
A list of all the drives, drive number, and status are displayed.
:\>select disk 1
CAUTION: This list assumes that the USB flash drive will be seen as disk 1. If otherwise, these commands can wipe a different drive, such as the hard-disk drive.
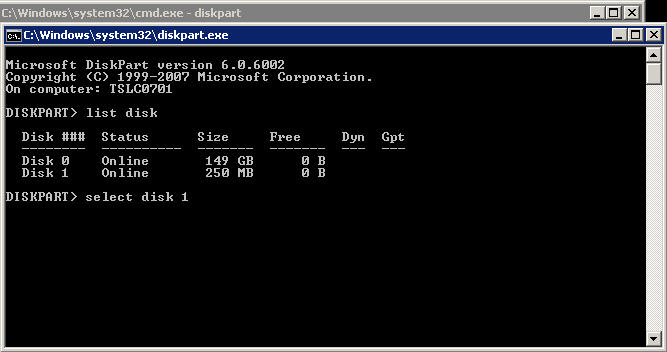
Disk 1 is now selected.
:\>clean
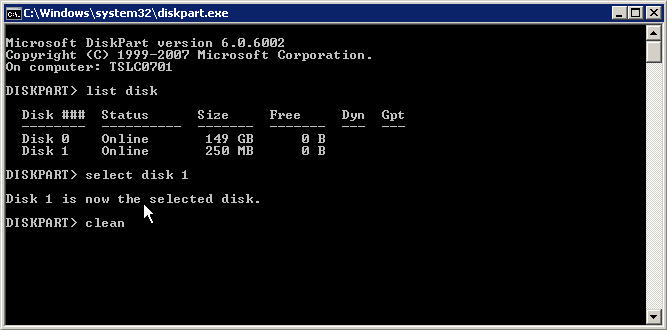
Diskpart cleans the selected disk.
:\>create partition primary
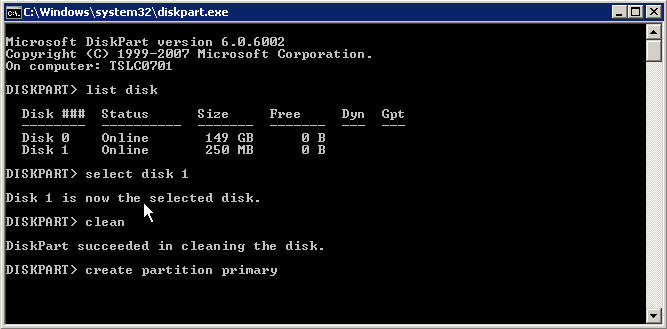
Diskpart creates a primary partition.
:\>select partition 1
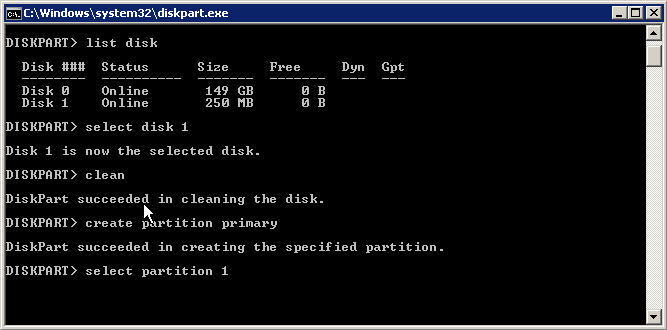
Partition 1 is selected.
:\>active
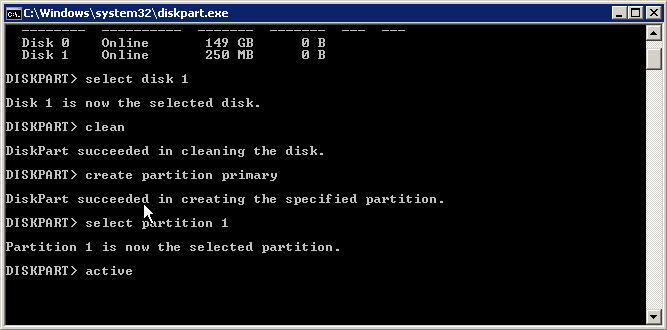
The current partition is marked as the active partition.
:\>format fs=fat32
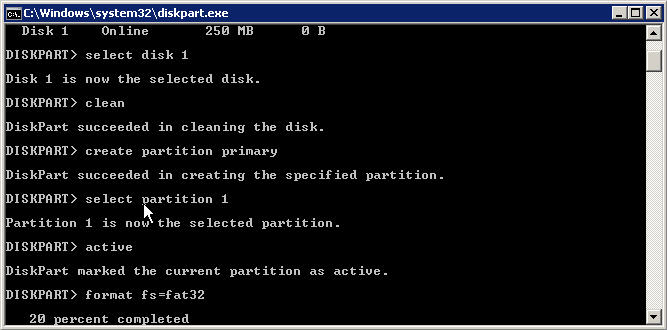
The partition gets formatted. The progress of the formatting is displayed in percentage.
:\>assign
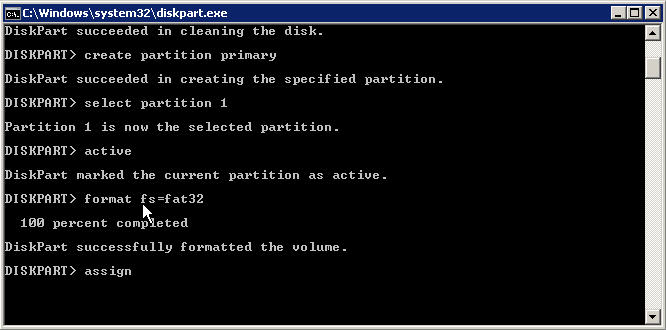
The drive letter or the mount point is assigned.
:\>exit
The diskpart application window is closed automatically. At this point the USB drive is formatted. Do not format the drive from within Windows.
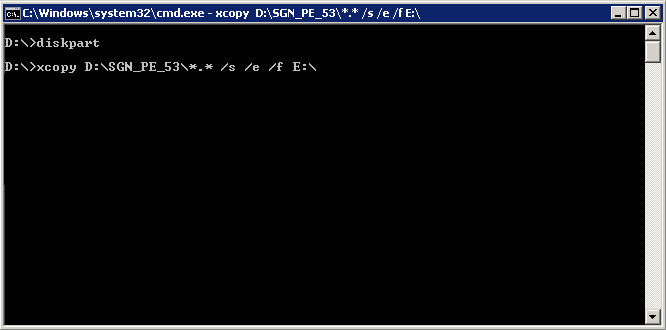
Copy the installation files to the flash drive. This can be done by running the following command:
:\>xcopy d:\*.* /s/e/f e:\
NOTE: D: is the drive letter for the source files and E: is the drive letter for the USB flash drive, if they are different, they should be changed accordingly.
The status displays all the files being copied successfully.
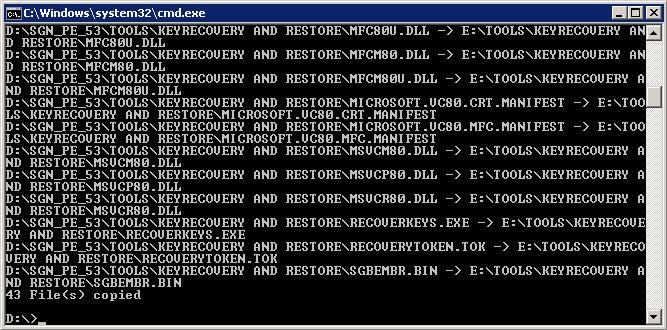
Check your local folders to confirm if all files have been copied.
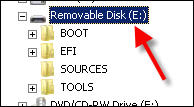
The USB drive can now be given to the endpoint user to boot the machine.